
To make this tag, you will need scrap papers, a photo frame, 2 photos or other images, Paint Shop Pro (I use 9.01, but I’m sure it’ll work in most versions).
Open and minimize your supplies.
Open a new image 400x400, white background. Copy the notepaper, paste on your image. If you wish to mask it, do so. I chose not to.
Add a new layer. Take your selection tool and draw out a rectangle somewhere in the middle of the image. Fill the rectangle with one of the scrap papers. Deselect.
Repeat this to get another rectangle. (See my tag for guidance)
Apply a drop shadow of your choice to the rectangles.
Now take your first image and your photo frame. Fit the frame to the photo and merge. Copy and paste on to your image. Resize to your liking.
Repeat with your second picture and resize and rotate to your liking.
Add the same drop shadow as before to the photos.
Apply some nice brushes to your tag. If you want the brushes to stand out more, you can add a slight drop shadow to them.
Either with your text tool or with a nice brush, add a saying or something like that to your tag. Add a drop shadow to it.
Back to your text tool. Apply your name on the tag and add a drop shadow to it as well.
Don’t forget to put proper credits to your tag. Hide the white bg and crop it to get rid of excess space. Unhide the white bg and save as .jpg.
That’s it!

Open and minimize your supplies.
Open a new image 400x400, white background. Copy the notepaper, paste on your image. If you wish to mask it, do so. I chose not to.
Add a new layer. Take your selection tool and draw out a rectangle somewhere in the middle of the image. Fill the rectangle with one of the scrap papers. Deselect.
Repeat this to get another rectangle. (See my tag for guidance)
Apply a drop shadow of your choice to the rectangles.
Now take your first image and your photo frame. Fit the frame to the photo and merge. Copy and paste on to your image. Resize to your liking.
Repeat with your second picture and resize and rotate to your liking.
Add the same drop shadow as before to the photos.
Apply some nice brushes to your tag. If you want the brushes to stand out more, you can add a slight drop shadow to them.
Either with your text tool or with a nice brush, add a saying or something like that to your tag. Add a drop shadow to it.
Back to your text tool. Apply your name on the tag and add a drop shadow to it as well.
Don’t forget to put proper credits to your tag. Hide the white bg and crop it to get rid of excess space. Unhide the white bg and save as .jpg.
That’s it!
***
I made an animated version of this tag, too.
It’s a bit more complicated, but follow me and I’ll try to explain the procedure.
When you have done everything except the saying, hit ctrl+shift+c (copy merged) and paste the image in Animation Shop.
Open your animated image that you want to use. Try to choose one with not too many frames! Mark all and export to PSP.
In PSP, add the photo frame to your animation. You will need to copy the frame several times and merge each layer separately. It’s very time consuming, but worth the time.
When you have all the layers of the animation with a frame, close the animation. You will be asked to save the animation, click no, the you will be asked to update back to AS, click yes.
Back in AS, you now have the updated animation. You will need to resize the animation if it is a big one, so it fits your tag.
Now copy your tag until you have equal amount of frames of it as your animation has.
Mark the propagate paste-button. Highlight all frames of both your tag and of your animation.
Drag the first image of your animation onto the first image of your tag, to where you want to place it. Wait for it – and there you have the animation pasted into your tag!
If you want a saying or other stuff added to the tag, that floats onto the animation, then just copy them from PSP, and paste them onto the tag.
Not very hard, but you may need to practice a few times.
Here’s how my animated tag turned out.
It’s a bit more complicated, but follow me and I’ll try to explain the procedure.
When you have done everything except the saying, hit ctrl+shift+c (copy merged) and paste the image in Animation Shop.
Open your animated image that you want to use. Try to choose one with not too many frames! Mark all and export to PSP.
In PSP, add the photo frame to your animation. You will need to copy the frame several times and merge each layer separately. It’s very time consuming, but worth the time.
When you have all the layers of the animation with a frame, close the animation. You will be asked to save the animation, click no, the you will be asked to update back to AS, click yes.
Back in AS, you now have the updated animation. You will need to resize the animation if it is a big one, so it fits your tag.
Now copy your tag until you have equal amount of frames of it as your animation has.
Mark the propagate paste-button. Highlight all frames of both your tag and of your animation.
Drag the first image of your animation onto the first image of your tag, to where you want to place it. Wait for it – and there you have the animation pasted into your tag!
If you want a saying or other stuff added to the tag, that floats onto the animation, then just copy them from PSP, and paste them onto the tag.
Not very hard, but you may need to practice a few times.
Here’s how my animated tag turned out.

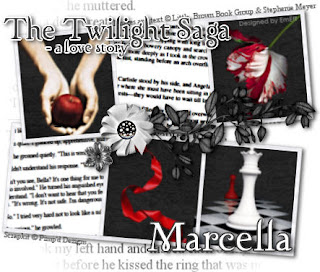 This tag is made in Paint Shop Pro 9, but will probably work in any version


